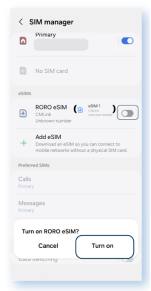
Before you start, please make sure that:
- Your phone is eSIM compatible. Check the eSIM compatible list here.
- You have the eSIM installation QR codeor activation code in your phone or infront of you.
- You have a stable Wi-Fi connection.
Once you have everything prepared, follow the steps below to easily install and activate your RORO eSIM on both iPhone and Android devices. Remember to complete the installation before your trip and activate the eSIM once you arrive at your destination.
 iPhone
  Android
eSIM Installation Guide for iPhone
Option 1: Quick Install If You Have iOS 17.4 or Newer In Your iPhone
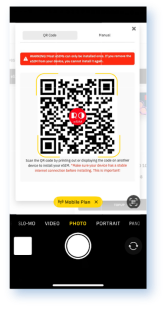
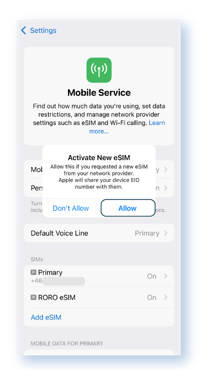
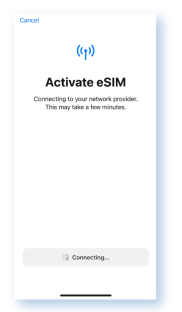
Open the rear camera of your iPhone and point it at the eSIM QR code. Your iPhone will automatically recognize the eSIM. Tap “Mobile Plan” showing up under the screen and click "Allow" to activate the new eSIM. It will be installed immediately.
|
Use camera to face the QR code, then click “Mobile Plan” |
Click “Allow” to proceed |
Start installation and complete within 1 minute |
 |
 |
 |
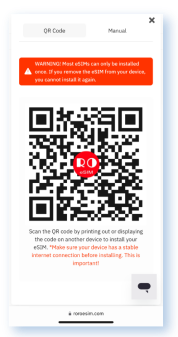
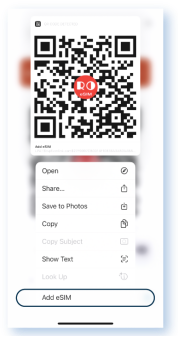
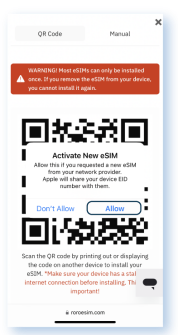
Or you can Log in to “My SIMs” on roroesim.com or RORO App on your phone, click Install eSIM then press the QR code on your iPhone’s screen. It will start the eSIM installation directly.
|
Use your phone to log in to “My SIMs” and find the QR code in “Install eSIM” |
Press the QR code on your iPhone screen then click “Add eSIM” |
Click “Allow” to start the installation and complete within 1 minute |
 |
 |
 |
eSIM Installation Guide for Android Phones
Different Android mobile phone brands may have different Settings menus. Connections, Network and Internet, Mobile Network, are the common names for finding where to add eSIM in the “Settings” of the phone.
Option 1: Quick Install If You Have The Latest Android Version
Open the rear camera of your phone and point it at the eSIM QR code. Your phone will automatically recognize the eSIM. Tap “Add plan to phone” showing up under the screen and click "Allow" to activate the new eSIM. It will be installed immediately.